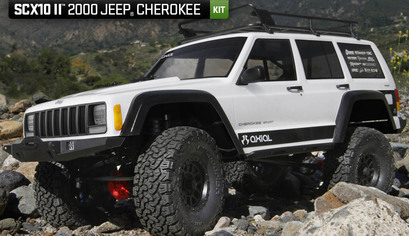
With the SCX10 II, we’ve kept essence of the SCX10 there with all-metal twin c-channel frame rails, but that’s only 2% of the 98% of a completely new design. Scale AR44 high pinion axles, a chassis mounted servo (CMS), re-designed transmission, front mounted battery tray, all aluminum suspension links, and a properly designed suspension for nearly zero bump steer. These are just a few of the features built into the all new SCX10 II.
|
2005 marked the birth of the Axial brand, and shortly after, thoughts about the first SCX10 began, with development wrapping up in 2008. The SCX10 was introduced to the world as a builders kit, paving the way, or better yet, raising the bar for a new generation of scale trail enthusiasts. Previously, hobbyists had to “scratch build” a rig which presented a lot of technical hurdles to overcome. The SCX10 kit gave these “artists” time to focus their attention on other things like personalization and visual customization by removing the issues scratch-built scale rigs presented. And, it wasn’t just as a great kit to build, it was also a very capable driving machine, making it the de facto scale rig the world over. The SCX10 chassis platform provided all the technical attributes as well as scale looks with its signature all-metal twin c-channel frame, solid performing transmission and axles that provided enough realism with capabilities to match. With the SCX10 II, we’ve kept essence of the SCX10 there with all-metal twin c-channel frame rails, but that’s only 2% of the 98% of a completely new design. Scale AR44 high pinion axles, a chassis mounted servo (CMS), re-designed transmission, front mounted battery tray, all aluminum suspension links, and a properly designed suspension for nearly zero bump steer. These are just a few of the features built into the all new SCX10 II. Special Thanks goes out to Axial for a truly new advancement to the most successful Scaler in the world!!!
0 Comments
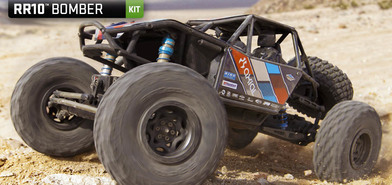
The RR10 Bomber build-it-yourself kit is loaded with features allowing you to customize it and add your own electronics for the ultimate rock racer! Building on the current, successful ready-to-run model, this kit version includes a wide variety of desirable option parts that deliver next level performance and durability. Hard anodized aluminum suspension links, hard anodized aluminum steering links, long travel rear sway bar, hardened steel universal axles allowing up to 50 degrees of steering, aluminum lower link plates, and King adjustable machined aluminum shocks, all riding on sticky BFGoodrich® Baja T/A® KR2 tires wrapped around 2.2 Walker Evans Racing beadlock wheels. We've also included heavy duty bevel gears in the front and rear axles for improved gear mesh, and increased strength. This is a nice kit and it looks like it retails for about $360.... Place your orders now and let us help you build your kit!!!!
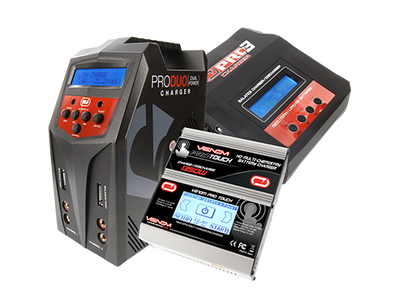
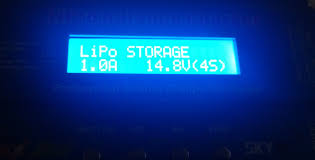
Yes. It is. Okay, seriously though, if you want your LiPo batteries to lead a long and happy life of servitude to you and your RC model, keeping the pack in good health is really important. LiPo batteries are very sensitive to their resting voltage. Batteries that are stored fully charged have the potential of a decreased lifespan and lackluster performance down the road. Batteries stored near their low voltage threshold run the risk of dropping below usable voltage and becoming an expensive paper weight. Most quality chargers today (like our Pro Duo Charger) have storage modes built into their programming. This is an excellent way to store your batteries for extended periods of time.
When using a storage charge, the charger will determine if the battery needs charged or discharged and will enter the appropriate program to safely bring your battery to a safe storage voltage (Approximately 60%-70% of mAh capacity). If you have any questions about storage charging, contact our customer support team as we’re always happy to help! Thank you goes out to Jeff Simon at the Venom Group for this tip..... 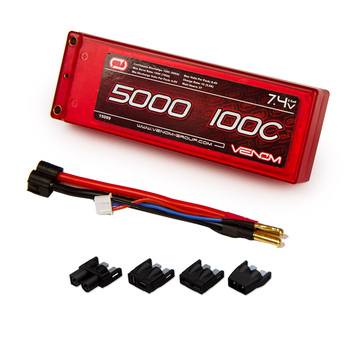 If you’re new to LiPo batteries, or have just purchased a quality hobby charger like our new ProDuo charger, you may be unfamiliar with how to safely set the charge rate for your battery. The battery manufacturer will tell you what the maximum “Charge Rate” of the battery is. This information is different than the “C-Rating” which is usually expressed as a number on the front of the pack (20C, 50C, etc). If you are unsure of your batteries charge rate, it is safe to charge the pack at a 1C rate. To determine this number, take the mAh rating of your pack and divide it by 1000. Example 1: If your battery is a 5000mAh pack, your 1C charge rate is 5A. (5000÷1000=5) Example 2: If your battery is 2200mAh your 1C charge rate is 2.2A. (2200÷1000=2.2) Example 3: If your battery is a 250mAh pack, your 1C rate would be .3. (250÷1000=.25 it’s okay to round up) If your batteries allow for a higher charge rate (1C-5C is the general range) simply take the numbers you came to calculating your 1C rate and multiply it by that factor. So let’s use the above 3 examples. Example 1: Our first example was a 5000mAh pack, which gives us a 5A charge rate at 1C. A 2C charge rate would be 10A, a 3C charge rate would be 15A and a 5C charge rate would be 25A. Example 2: 2200mAh 1C charge rate = 2.2A 2C charge rate= 4.4A 3C charge rate= 6.6A 5C charge rate= 11A Example 2: 250mAh 1C charge rate = .3A 2C charge rate = .5A 3C charge rate = .8A 5C charge rate = 1.3A You should now be confident when it comes to setting the “AMP” rate when charging LiPo batteries. Always double check that your voltage is set to the same one listed on your battery label and you’ll be out at the track or up in the air in no time! Thank you goes out to Jeff Simon at the Venom Group for this tip..... |
AuthorRCcarStars technicians are always happy to provide our customers and fans with tips and tricks on maintaining your RC cars and trucks. Archives
August 2022
Categories
All
|



 RSS Feed